
If your metal watch band is too big, you can always make it smaller to ensure a perfect fit by removing links. You can use this guide to remove plate pin links from expansion watch bands. You can recognize an expansion band by its flexible and stretchy style, and you can identify a plate pin style band by looking at the edge of the links. If you look at the edge of the link and the two sides appear to be simply sitting on top of each other, you are dealing with a plate pin style band. In between the two big sides, you should be able to see a thin metal piece above each of the bottom links.
Tools Needed:
- A bench mat or other protected surface
- A watchmaker’s bench knife
- A pair thin nose pliers
- A parts tray
- A watch band holder
- And a ball-peen hammer
Step 1
When you need to adjust the length of your metal watch band by removing links, it helps to know exactly how many links you need to remove. To learn How to Determine How Many Links to Remove from your watch band, check out this article.
Once you know how many links you need to remove from the band, you need to decide how many links you are removing from each side of the watch band. Most expansion bands with plate pins have clasps and you need to be sure to split the total links to be removed between both sides of the clasp so it will stay centered on your wrist.
Step 2
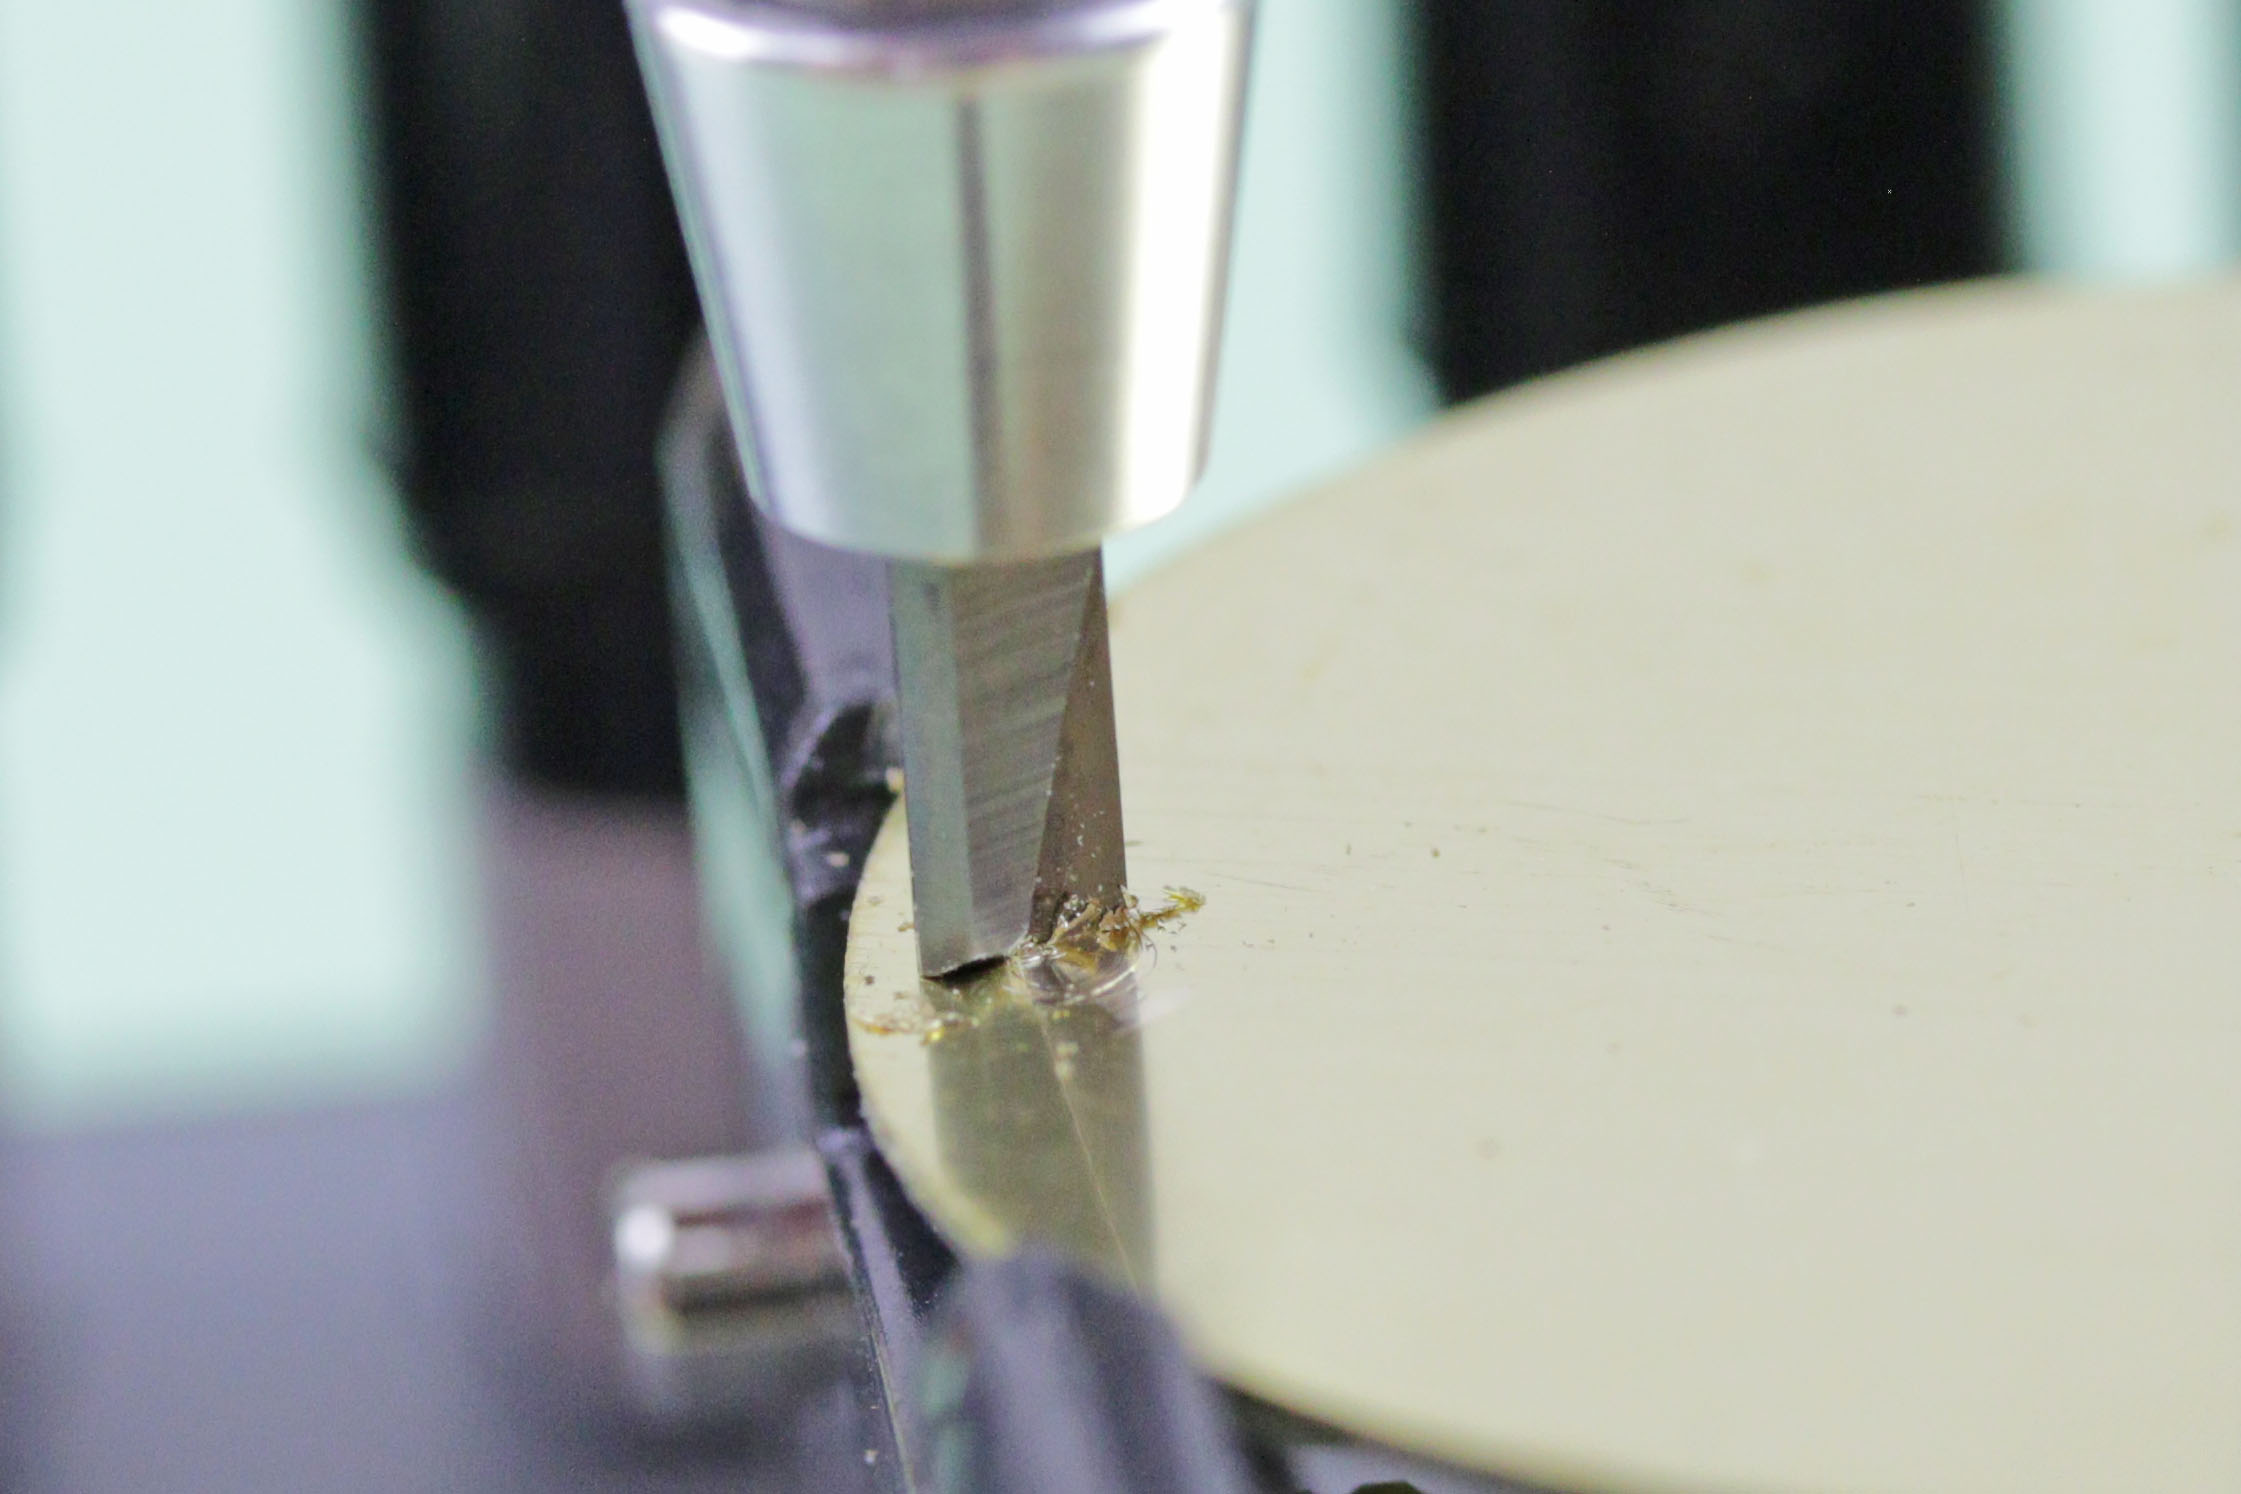
Place the watch band on your bench mat on its side with the flat inside of the band facing you. The first thing you are going to do to remove the links is to peel open the edge of the base link. Find where the link turns up toward the top link cover and slip the blade of your bench knife under the tab. Grip the band and press your thumb into the back of the band over the link you are trying to remove. Pry the tab up by lifting the knife blade up and turning it toward your thumb.
You may have to do this several times before you open the tab enough to allow you to remove the link. If you have issues opening the links, once you get the work started with your knife blade, you can use your pliers to pull the tabs more open.
Step 3
Turn the watch band over so you can open the tab on the other side of the base link you started working on. Insert the blade of your bench knife under the tab and grip the band securely with your thumb holding the link steady. Pry this tab up with your bench knife like you did before. Lift the blade up and turn it toward your thumb to open it. Repeat this until the tab is pulled back to expose the plate pin inside the link. Remember to use your pliers if necessary to open it all the way.
Step 4
Take your sharp nosed pliers and grab the thin metal bar that sits between the two sides of the link. Pull the plate pin out of the links. You may need to wiggle the pin a little as you pull on it to get it out of the band. Set it in your parts tray.
Step 5
Once the plate pin is free, you need to remove the base link from the band to open it. To remove this part of the band you’ll need to bend it at a right angle to unhook the metal bar. The back of the band should be on the inside of the angle and you will need to wiggle the band until one side of the base link comes free.
Let the loose side of the band fall free and focus on the side of the base link that is still attached to the band. Hold the band flat and tilt the loose piece, pulling it up until it comes totally free. Add the base link to your parts tray to keep it safe.
Step 6
Now that the band is open, count the number of links you need to remove from this side of the band. Then, reposition the band in your hand so you can remove the next link. Make sure that the band is between your thumb and fingers with your thumb pressed across the link you want to open.
Step 7
Slide your bench knife under the first tab of the base link you want to open. Carefully pry the tab up with your knife. Lift the blade up and turn it toward your thumb. Try to keep the blade from slipping to avoid damaging the watch band. You can use your pliers if necessary to pull the tab completely up.
When the first tab has been lifted open enough that there is nothing over the thin metal bar inside the link, turn the watch over to lift the second tab of the base link. Again, take your bench knife and carefully slide it under the tab. Pull the knife up and tilt it toward your thumb to open the tab so you remove the base link. It may take a couple tries to fully open the tab.
Step 8
Then, you will take your pliers and remove the plate pin from between the links. Stick the nose of the pliers between the links and grab the thin metal piece that you see. Pull the pliers up to remove the plate pin. You may need to wiggle the pin a bit to be able to free it from the link. Place the plate pin in your parts tray when it’s free.
Step 9
The base link will still be holding the band together, even though the plate pin is gone. To remove this part of the link, you will need to bend the band at a right angle with the back of the band on the inside of the angle. The base link is hooked to the top of the two link covers and by bending the band and wiggling the two sides of the band you can unhook the bar from one side of the band. If the base link is attached to the links that fall loose, you can leave it there. If not, you will need to remove it from the links that are still attached to the band. Set these loose links aside in your parts tray with the base link.
Step 10
With these first links removed, you are ready to put this side of the watch band back together. Hold the watch band in one hand so that it is laying flat with the outside of the band facing up. Make sure it is not curling down at the end.
Grab a loose base link from your parts tray and place it under the band that the open side with the teeth is facing up toward the back of the band. Place the base link under the edge of the band, and angle it at a forty-five degree angle. Slide it up and across the end of the band until the teeth catch in the bottom of the link cover. It might take a couple tries to get it in right.
Step 11
Next, take the other loose end of the band and prepare to connect it to the side you just connected the base link back to. The finished side of the band should still be facing up. Bring the two ends together and set the side without the base link over the other side. Keeping the two ends close together, slide the link cover down to catch on the hooks of the base link. You may need to stretch the band to get it to catch.
Step 12
When the two ends of the band have been connected with the base link, hold them together and slide them into your watch band holder so they can’t fall apart. Once the band is held securely in the holder, grab one of the loose plate pins from your parts tray and prepare to insert it into the gap formed in the band by the base link you just reattached to the link cover.
Step 13
Prepare to insert the plate pin back into your band. The plate pin looks a little like a sculpted mustache and should fit into the band under the teeth of the base link. It will work a little like this, if you imagine that you can see through the link cover. Slip the plate pin into the gap so that the two upturned ends are facing up toward the link cover side of the band. The plate’s curved ends should also slide under the metal teeth and you may need to angle it to get it to fit in place. You will have to use some pressure to slide the pin into place and may need to wiggle it a little until it falls into place. If you need, you can use your closed pliers to push the plate pin into place inside the link pieces.
Step 14
After you have positioned the plate pin inside the links, you will need to press the base link tabs closed again. Start by folding the tab back into place with pliers to get it started. Once you have started the process you will use the flat side of your bench knife to push the link closed. You may have to do this more than once.
If the metal is tough and you can’t press it back down, you can use a small ball peen hammer to close the tabs. Keep the flat of the knife blade pressed to the tab and tap on the blade with your hammer like so. Stop when the tab is flush with the other tabs in the band.
Step 15
Remove the watch band from the holder when the first tab has been pushed flat again. Turn the band over and reinsert it into the holder to close the second tab. Take your jewelers pliers and start closing the tab by folding it back over the link. Just pull it enough over the link to get it started, you don’t want to damage the tab with the pliers. Then with your bench knife, push the tab closed with the flat side of the blade. Keep pressing the tab down until it is flush with the other base link tabs.
If you can’t close the tab completely with your knife because the metal is stubborn, you can use the flat head of your ball peen hammer to finish closing it. Keep the blade over the tab and tap on the blade with the hammer until the tab is flush with the band.
Step 16
With the band securely back together, you can remove it from the band holder. Before you remove any links from the other side of the band, put your watch back on and check the fit. Feel free to do the link test again and see if you still need to remove the number of links you expected.
Step 17
Once you have verified the number of links you need to remove, take the watch off again. Turn it and place the band in the holder so you can remove the next links from the other side of the band – if the watch has a clasp.
Repeat steps 3 through 16 to remove the remaining links and put the band back together again.
Finished
Now that your watch band fits just the way you want, you can wear it again. Be sure to keep the extra links and pins that you removed from the watch in case you need them again in the future. If your expansion band becomes too small, you can always take those extra links and use them to Add Plate Pin Style Expansion Band Links to your watch band with this guide.
Leave A Comment