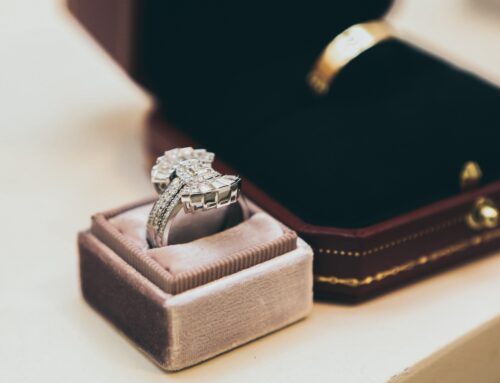
Jewelers have known for years that coin bezels often need some adjustments and they have developed their own way of keeping the coin from moving, spinning, or making a clicking sound (being loose). All coins can vary in size from year to year and from where they were produced or “minted” so there is rarely a perfect fit when setting coin bezels.
When your are ordering coin bezels, it is important to measure the coins millimeter size both in diameter and thickness before ordering your coin bezel. Using a digital gauge is the best way to ensure exact measurements when measuring coins, jewelry, stones, and watch parts.
This article covers coins that are fitting loose in the bezel; if on the other hand, the coin is too tight fitting, it does not become a problem until the thickness of the coin will not fit the bezel or the top of the bezel will not push together using light pressure (where the screw goes in). Covering the coin with a plastic or glass watch crystal is also a common custom modification that can require shimming for loose fitting coins.
Some jewelers use a torch and weld metal into the bezel to keep the coin secure, others use different materials for a "shim" including; paper, plastic, metal sheet, and other everyday materials. We have two (2) suggested methods of making a slight adjustment to
make a coin fit tightly; both methods are simple but require some hand coordination and some very basic tools.
These two methods are made to solve the problem of having a coin that is slightly smaller in diameter than the diameter of the
coin bezel and will NOT solve problems of having a coin that is too big, too thick, or a coin that is very loose and flopping around in the bezel (even after tightening the screw).
Method #1 - Using a o-ring watch gasket
Jewelers many times have watch gaskets in their shop to use for watch repair because it is common to replace a watch back gasket after you have changed a watch battery. Using a small piece of rubber gasket, you are able to make adjustments even while the coin is being set in place. You can also use several pieces of gasket around the bezel for precise fitting. There are several different thicknesses of gaskets available so you should be able to get a good fit with some trial and practice. The advantage of using a rubber gasket in tightening coins is that you can remove the coin without scrapping or cleaning off glue or other adhesives as the gasket it only set in place and that a gasket will be long wearing and the gaskets properties will keep the coin firmly in place. When choosing the gasket to fit the coin bezel, use the thinnest gasket possible that will secure the coin to reduce and stress on the bezel and to keep visibility of the gasket down.
List of Tools:
• You will need a jeweler's screwdriver with a small flat blade; we suggest one that has a blade measuring from 1.0 – 1.20 mm in width. Use the screwdriver to first take the small screw out of the fitting of the coin bezel
• You will also need a thin rubber gasket to be used as the "shim"; we suggest a gasket that is over 20mm in diameter (to match the curve of a coin
bezel) and under 0.6mm thickness (watch gaskets for coin bezels #84.314)

Using an ordinary scissors, cut a small part of the o-ring gasket out.

Place the piece of gasket into the bottom of the coin bezel loosely.
If you are using several pieces of gasket around the coin bezel, you may need to "tack" the gasket in place using a quick drying cement or glue to prevent the gasket pieces from shifting or falling out while setting the coin into the bezel.

Open the bezel to fit the coin by placing the bottom portion of the coin over the gasket first (try to keep the gasket in place so it does not show through either side)
Important; Be careful when spreading the coin bezel open that you only bend as far as needed to slip the coin into place to prevent bending or kinking the coin bezel out of shape.

Pinch the coin bezel together at the top with your finger and check the fit then, using a screwdriver, tighten the screw to secure the coin in place.
While putting the screw back into place make sure not to over tighten it which will cause the screw and its fitting to get stripped.
Method #2 - using epoxy or adhesive bonding agent
There are many types of adhesives, glues, and epoxy's to choose from but make sure that your choice will stick to metal surfaces. Because coin jewelry gets worn everyday by a variety of people, you need an adhesive that can hold up to some tough hits, water, variety of environments (humidity, temperature) and chemical exposure (like soap, shampoo, and perfumes). Using glue can make it difficult to remove or re-use the bezel and can possibly damage a coin or reduce the worth of the coin. Placing the correct amount of epoxy can also be tricky and can take some practice you might only have one chance at gluing the coin in correctly - be careful not to use too much or to little.
List of Tools:
• You will need a jeweler's screwdriver with a small flat blade; we suggest one that has a blade measuring from 1.0 – 1.20 mm in width. Use the screwdriver to first take the small screw out of the fitting of the coin bezel.
• Jewelry Epoxy
•
Watchmakers pegwood, sharpened point
• Notepad of paper
• Cleaning cloth

Using
jewelers epoxy; place equal amounts of epoxy on a notepaper (small drop of each).

Mix the epoxy for about 30 seconds using a sharpened pegwood or toothpick.

Place a small drop of epoxy (the size will depend on how loose the coin is) on the bottom and two sides of the inside of the coin bezel.
Warning:
Only place the glue on the inside ridge around the very outside where the coin will touch. Glue can spread easily and if too much is placed in the area, it will cause the glue to spread out onto the coin and coin bezel and become a visible distraction. Too much glue can also cover parts of the coin that would be difficult to remove and possibly reduce the value of the jewelry or coin.
Too little glue will not hold the coin in place and it will become loose again over time and being worn.

Open the bezel to fit the coin sliding in the bottom of the coin over the epoxy (try to keep the coin in place so it does not turn and smear the epoxy) check for extra epoxy immediately and remove with a soft cloth.
Important: Be careful when spreading the coin bezel open that you only bend as far as needed to slip the coin into place to prevent bending or kinking the coin bezel out of shape.
Pinch the coin bezel together at the top and check the fit then, using a screwdriver, tighten the screw to secure the coin in place.
While putting the screw back into place make sure not to over tighten it which will cause the screw and its fitting to get stripped.
Using epoxy as a spacer or "shim"
Another option with using glue or epoxy that will not actually have glue stick to the coin is to
let the glue dry using the glue droplet as the spacer to tighten the coin in place. Using this method can be tricky as it is difficult to guess how much glue will be thick enough to tighten the coin in place. The epoxy droplets can be placed around the inside of the coin bezel equity or just on the bottom in one place. By starting with very little and letting the glue dry, you can build up the glue droplet until the coin is fit snuggly (This method will take more time as some adhesives can take over 1hr to dry) When dry, most glue or epoxy will harden to a very rigged surface that should hold the coin safely in place.
Conclusion
Fitting coin bezels is not rocket science and almost anyone can make adjustments easily. Keep in mind important factors like the value of the coin and if you might possibly want to have a professional jeweler make the adjustments. The more chances you have to work on coin bezels and the more you work with jewelers tools, you will get better and pick up your own style and creative ideas for making jewelry.
Other articles that may help you: